

Custom Steel Workshop Layout Ideas: 2026 Guide
Table of Contents
- Custom Steel Workshop Layout Ideas: Start With How You Work
- Metal Workshop Floor Plans: Zones That Keep Steel Moving
- Workshop Workflow Optimization: From Raw Steel to Finished Part
- Best Practices for Workshop Lighting and Electrical
- Equipment Placement and Material Handling for Steel Shops
- Clear-Span Building Design: Dimensions, Doors, and Future Growth
- Ventilation, Fume Extraction, and Fire-Safe Separation
- Conclusion: Turn Your Layout Plan Into a Building
- Frequently Asked Questions
Last Updated: October 8, 2026
Custom Steel Workshop Layout Ideas: Start With How You Work
The best custom steel workshop layout ideas start with a single question: what actually happens inside the building? This guide from Terrapin Steel Buildings walks through zoning, material flow, utilities, and building dimensions so your shop works as hard as you do.
Most people design a steel workshop around a catalog picture. That is backwards. The building should follow the work, not the other way around.
Below, we break down how to match a steel workshop layout to your trade, size each zone before you commit to a footprint, and plan the electrical and ventilation systems that are far cheaper to install during construction than to retrofit.
Sketch your workflow on paper before you sketch the building. Every zone, door, and utility run should trace back to how steel actually moves through your shop.
Match the Layout to Your Work Type
A fabrication shop, a repair bay, and a storage building need three different floor plans, even if they share the same square footage. Start by naming the work you do most.
- Welding and fabrication: centralized welding table, short runs to cutting and grinding, long stock stored parallel to the main aisle
- Machining: heavier floor pads under machine tools, coolant and chip management, tighter climate control
- Vehicle and equipment repair: wide bay doors, clear vehicle access, a dedicated parts and tool crib
Write down your three most common jobs and the tools each one needs. That list becomes your zone map.
Metal Workshop Floor Plans: Zones That Keep Steel Moving
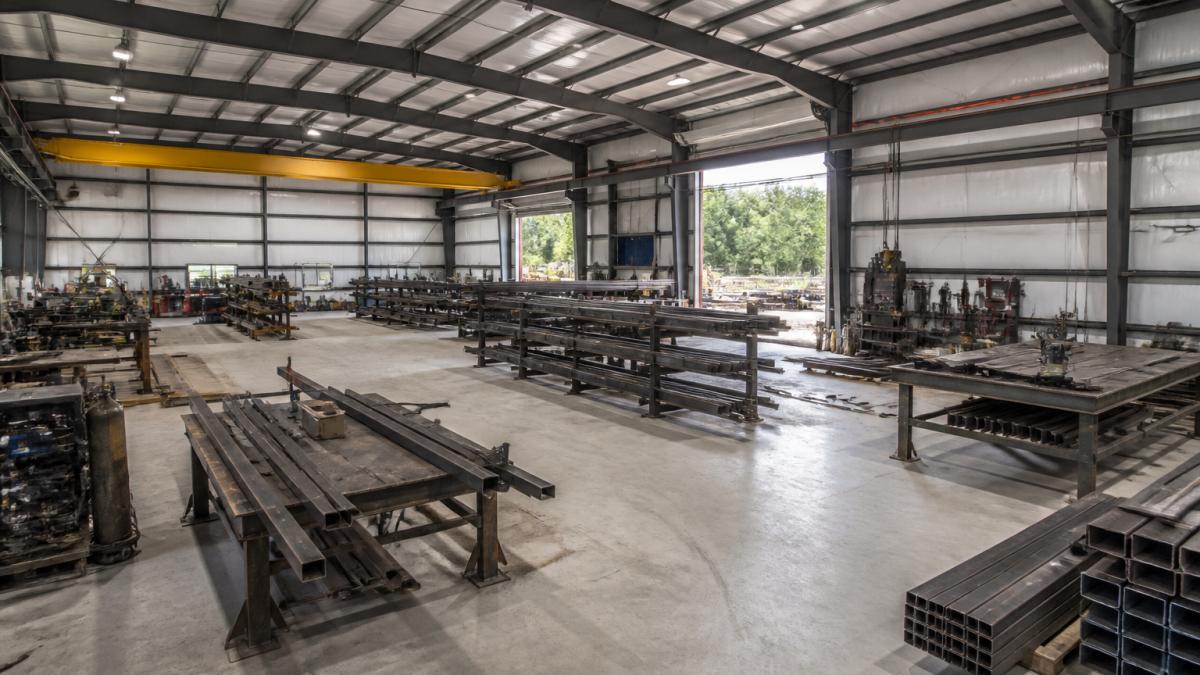
A workable metal workshop floor plan separates four zones: receiving and raw steel storage, cutting and machining, welding and assembly, and finishing and dispatch. Keep each zone in the same relative position so material moves in one direction instead of crisscrossing the floor.
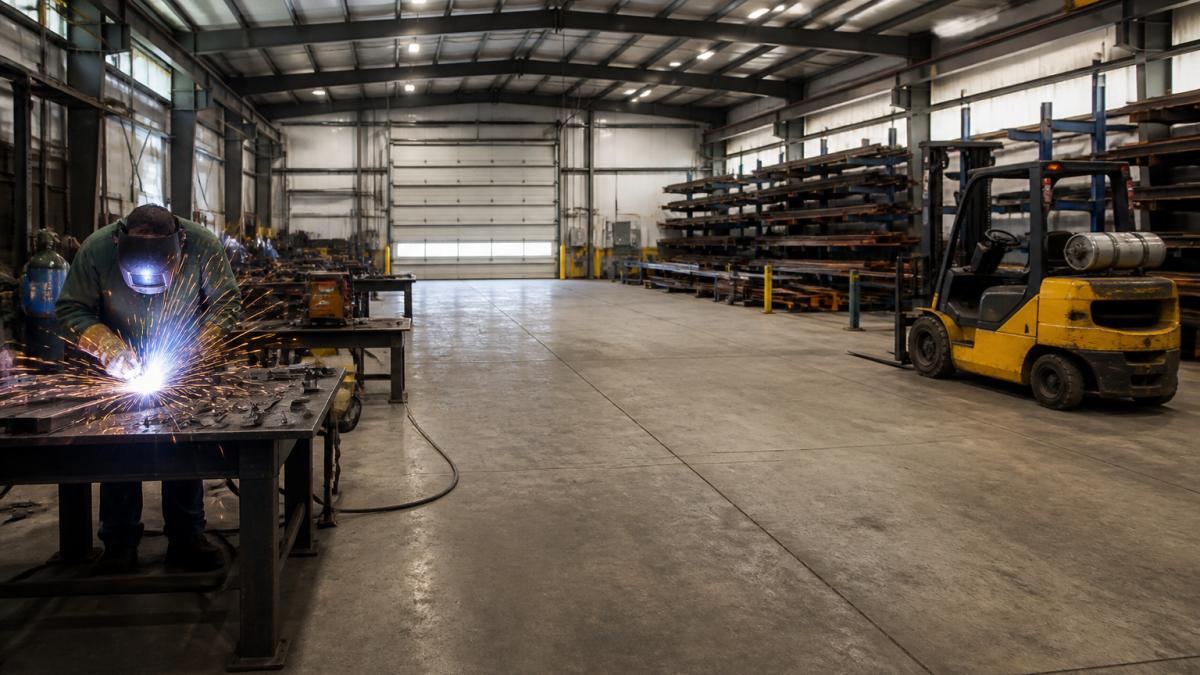
The biggest mistake we see is putting the welding table in the middle of the shop “because there’s space.” That placement blocks the main aisle and forces every long part to turn sideways.
Sizing Each Zone Before You Build
Raw steel storage needs the longest wall you can give it. A common approach is to reserve one full wall for racking so 20-foot and 24-foot stock sits parallel to the aisle rather than jutting into traffic.
Cutting and machining want proximity to storage but separation from welding, since sparks and grinding dust damage precision surfaces. Welding and assembly need open floor around the table plus clearance for a second person.
Skipping a dedicated grinding and cutting zone is the most expensive shortcut. Grinding dust settles on machine tools, contaminates paint, and creates a fire risk near stored flammables. Wall it off or at least position it downwind of the assembly area.
Workshop Workflow Optimization: From Raw Steel to Finished Part
Workshop workflow optimization means arranging the shop so a part travels the shortest sensible distance from raw steel to finished part, with no backtracking.
Picture the path: steel arrives at the receiving door, gets cut to length, moves to the welding table, then to finishing, then out the same door or a second one.
A simple test works well here. Walk the route with a tape measure and note the distance between each station.
- Receiving door → raw steel rack: as short as possible
- Raw steel rack → cutting station: adjacent
- Cutting station → welding table: direct, no turns around parked equipment
- Welding table → finishing: downhill of dust and sparks
Best Practices for Workshop Lighting and Electrical
Best practices for workshop lighting and electrical come down to planning both systems before the slab is poured. Layout decisions made later cost far more to correct.
Lighting should put even, shadow-free light over every workbench, welding table, and machine tool. Task lighting directly over precision work, plus general high-bay lighting for the open floor, keeps operators from straining and reduces errors.
Electrical planning deserves the same care. Welders, plasma cutters, air compressors, and machine tools draw heavy loads.
- Dedicated circuits for welders and large machine tools
- Outlets positioned at each workstation, not just on perimeter walls
- Compressed-air drops planned alongside electrical runs
- Separate circuit for lighting so a tool trip does not darken the shop
Run compressed-air lines and electrical conduit together during construction, even if you only need one drop today. Adding a second drop later means opening walls or running surface conduit, which is slower and looks worse.
Equipment Placement and Material Handling for Steel Shops
Equipment placement should follow material handling, not the other way around. Put the machines that process the heaviest, longest material closest to the door where that material enters, then arrange everything else along the path that material travels.
The welding table anchors the shop. Give it open floor on at least two sides, a common working target is enough clear floor for a second operator to stand, turn, and swing a grinder without stepping into the aisle.
Dimensioned Clearances That Actually Work
Most layout mistakes come from guessing at clearances. These are the working numbers most shop planners settle on after a few revisions:
- Main vehicle aisle: wide enough for your forklift or loader plus its load, with room to pass a person walking alongside. Measure your widest loaded move, then add a margin, a narrow aisle that “just fits” the forklift leaves no room for error.
- Pedestrian route: keep hand-carry paths separate from forklift traffic. Where they must cross, mark the crossing and keep sightlines open.
- Welding table clearance: open floor on two sides minimum, with enough room behind the operator for a second person to fit up parts or run a grinder.
- Machine tool envelope: the machine’s full travel plus operator standing room, plus space to load and unload stock without backing into the next station.
Material Handling Mechanics
Material handling is where layout pays off or falls apart. Long stock is the hardest thing to move, so plan its route first.
- Receiving to storage: the shortest possible run from the overhead door to the rack, ideally straight in so a forklift never has to turn with a 24-foot bundle.
- Storage to cutting: adjacent, so cut lengths travel a few steps rather than across the shop.
- Cutting to fit-up and welding: direct, with no parked equipment in the path.
- Welding to finishing: downhill of grinding dust and sparks, so finished surfaces stay clean.
A simple test works well here. Walk the route with a tape measure and note the distance between each station. Most shops that feel cramped are not short on space; they are short on a straight line.
| Zone | Position in Shop | Key Requirement |
|---|---|---|
| Raw steel storage | Longest wall | Racking parallel to aisle for long stock |
| Cutting and machining | Near storage, away from welding | Stable pads, dust separation |
| Welding and assembly | One side, open floor around table | Clearance for two operators |
| Finishing and dispatch | Nearest overhead door | Ventilation and clean exit path |
Sketch the forklift route on graph paper before you place a single machine. If the route has a tight turn or a blind corner, redesign the layout now, moving a welding table is cheap, moving a loaded forklift through a bad aisle every day is not.
Clear-Span Building Design: Dimensions, Doors, and Future Growth
Clear-span building design removes interior columns so you get one uninterrupted floor. For a steel workshop, that open span is what makes a flexible layout possible.
When you specify dimensions, work backward from your longest material and your largest vehicle or machine.
Future expansion is worth planning now. Adding a bay later is simpler if you leave one wall clear of utilities and design the structure so it can extend.
Owners who expect to grow: a clear-span shop with one utility-free wall, sized for the equipment you plan to add, not just what you own today.
Ventilation, Fume Extraction, and Fire-Safe Separation
Ventilation and fume extraction are not optional in a welding shop. Welding fumes, grinding dust, and paint vapors all need to leave the building, and the layout should make that easy.
Place welding and grinding stations where an exhaust hood or extraction arm can reach them without long duct runs. Fresh-air intakes should sit away from exhaust outlets so you are not pulling fumes back inside.
Fume Capture That Works
Source capture beats general ventilation for welding fumes. A few practical rules most shop planners follow:
- Extraction arm reach: position the arm so the hood can sit close to the arc without blocking the operator’s view or the weld itself. An arm that has to stretch across the table loses effectiveness.
- Duct runs: keep them short and direct. Long, winding runs reduce airflow and collect dust.
- Makeup air: every cubic foot of air you exhaust has to come back in. Plan a makeup-air path so the shop does not pull fumes from the finishing area or starve the exhaust.
- Grinding and cutting: these produce dust and sparks, not just fumes. Local capture or a downdraft table keeps dust off machine tools and out of paint.
Fire-Safe Separation
Fire-safe separation means keeping flammables, solvents, and gas cylinders away from spark-producing work. A common approach is a dedicated storage area with a fire-rated barrier between it and the welding zone, plus clear egress paths that never route through the hot work area.
Gas cylinders: store upright and secured, away from heat and sparks, ideally outside the main work area or behind a barrier. Keep oxygen and fuel-gas cylinders separated per common practice.
Flammables and solvents: store in a dedicated cabinet or room, not on an open shelf near the welding table.
Hot-work zone: define it clearly and keep combustible materials out of it. Sweep up grinding dust and oily rags regularly, both are common ignition sources.
Egress paths: keep them clear and routed away from welding and grinding zones, so a fire never blocks the way out.
Extraction arms within reach of every welding position
Fresh-air intakes positioned away from exhaust discharge
Flammables and gas cylinders stored behind a fire-rated barrier
Egress paths that avoid welding and grinding zones
Conclusion: Turn Your Layout Plan Into a Building
Getting the layout right is the hard part, and it is the part most buyers rush. Once you know your zones, workflow, utilities, and dimensions, the building itself becomes straightforward.
Terrapin Steel Buildings builds 100% American-made steel shops with 12-gauge framing, engineer-certified to meet local or state codes, and installed by factory-trained, licensed, and insured crews. Every structure carries a 20-year manufacturer’s warranty on the framing, and the buildings are maintenance-free and built to handle tough weather.
Frequently Asked Questions
What is the ideal layout for a steel workshop?
The ideal steel workshop layout follows your production flow: raw steel stock enters one end, moves through cutting, welding, grinding, and drilling stations, and exits as a finished part. Keep long materials stored parallel to a main aisle so they feed machines without turning. Place the welding table and workbench at the center, with clear walkways at least 3 feet wide around each station. This arrangement reduces part movement and keeps the shop floor organized.
How do I maximize space in a custom metal building?
Maximize space by storing long steel stock vertically or on wall-mounted racks instead of on the floor, and by using clear-span construction so interior columns do not break up your work zones. Plan aisles and equipment placement around your workflow before you finalize shop dimensions. Overhead storage, rolling tool carts, and workbenches with shelving underneath also free up floor area. A custom design lets you size the building to fit these zones instead of forcing your layout into a standard plan.
What should I consider when planning electrical and lighting for a steel shop?
Plan for more outlets than you think you need, including 240-volt circuits for welders, compressors, and machining equipment, and place them near each workstation rather than along one wall. Use LED high-bay fixtures positioned so light falls between you and the work, not behind you, to avoid shadows. Steel framing can make future wiring changes harder, so map conduit runs and panel capacity before construction. Also plan compressed-air lines and ventilation at the same time.
Should I design a custom steel workshop layout from scratch or use a standard plan?
Design from scratch when your work involves long steel, overhead cranes, or specific machinery that a standard plan cannot accommodate. A custom layout lets you set clear-span width, door height for vehicle access, and zone sizes around your actual fabrication workflow. Standard plans work for general-purpose shops with light equipment. Because steel buildings are engineer-certified to meet local codes, a custom design also helps you pass inspection with the right clearances and structural capacity.